The Best Fluffy Pancakes recipe you will fall in love with. Full of tips and tricks to help you make the best pancakes.
Containers have become the preferred method for bundling an application along with its software and operating system dependencies, allowing easy deployment across different environments.
In this article, lets look at containerizing a Spring Boot application:
- building a Docker image using a Docker file
- building multi-container spring boot apps with docker compose
- optimizing the spring boot image at runtime
Container Terminology
- Container Image: A container image is a lightweight, standalone, executable package of software that includes everything needed to run an application: code, runtime, system tools, system libraries and settings.
- Container: A container is a runtime instance of a container image. A container consists of
- A contianer image
- An execution environment
- A standard set of instructions
- Container Engine: It is the daemon process which provides the runtime environment to run containers. Docker Engine is one such container engine.
- Container Registry: A Registry is a hosted service containing repositories of images.
- Container Host: The host machine where the container engine runs.
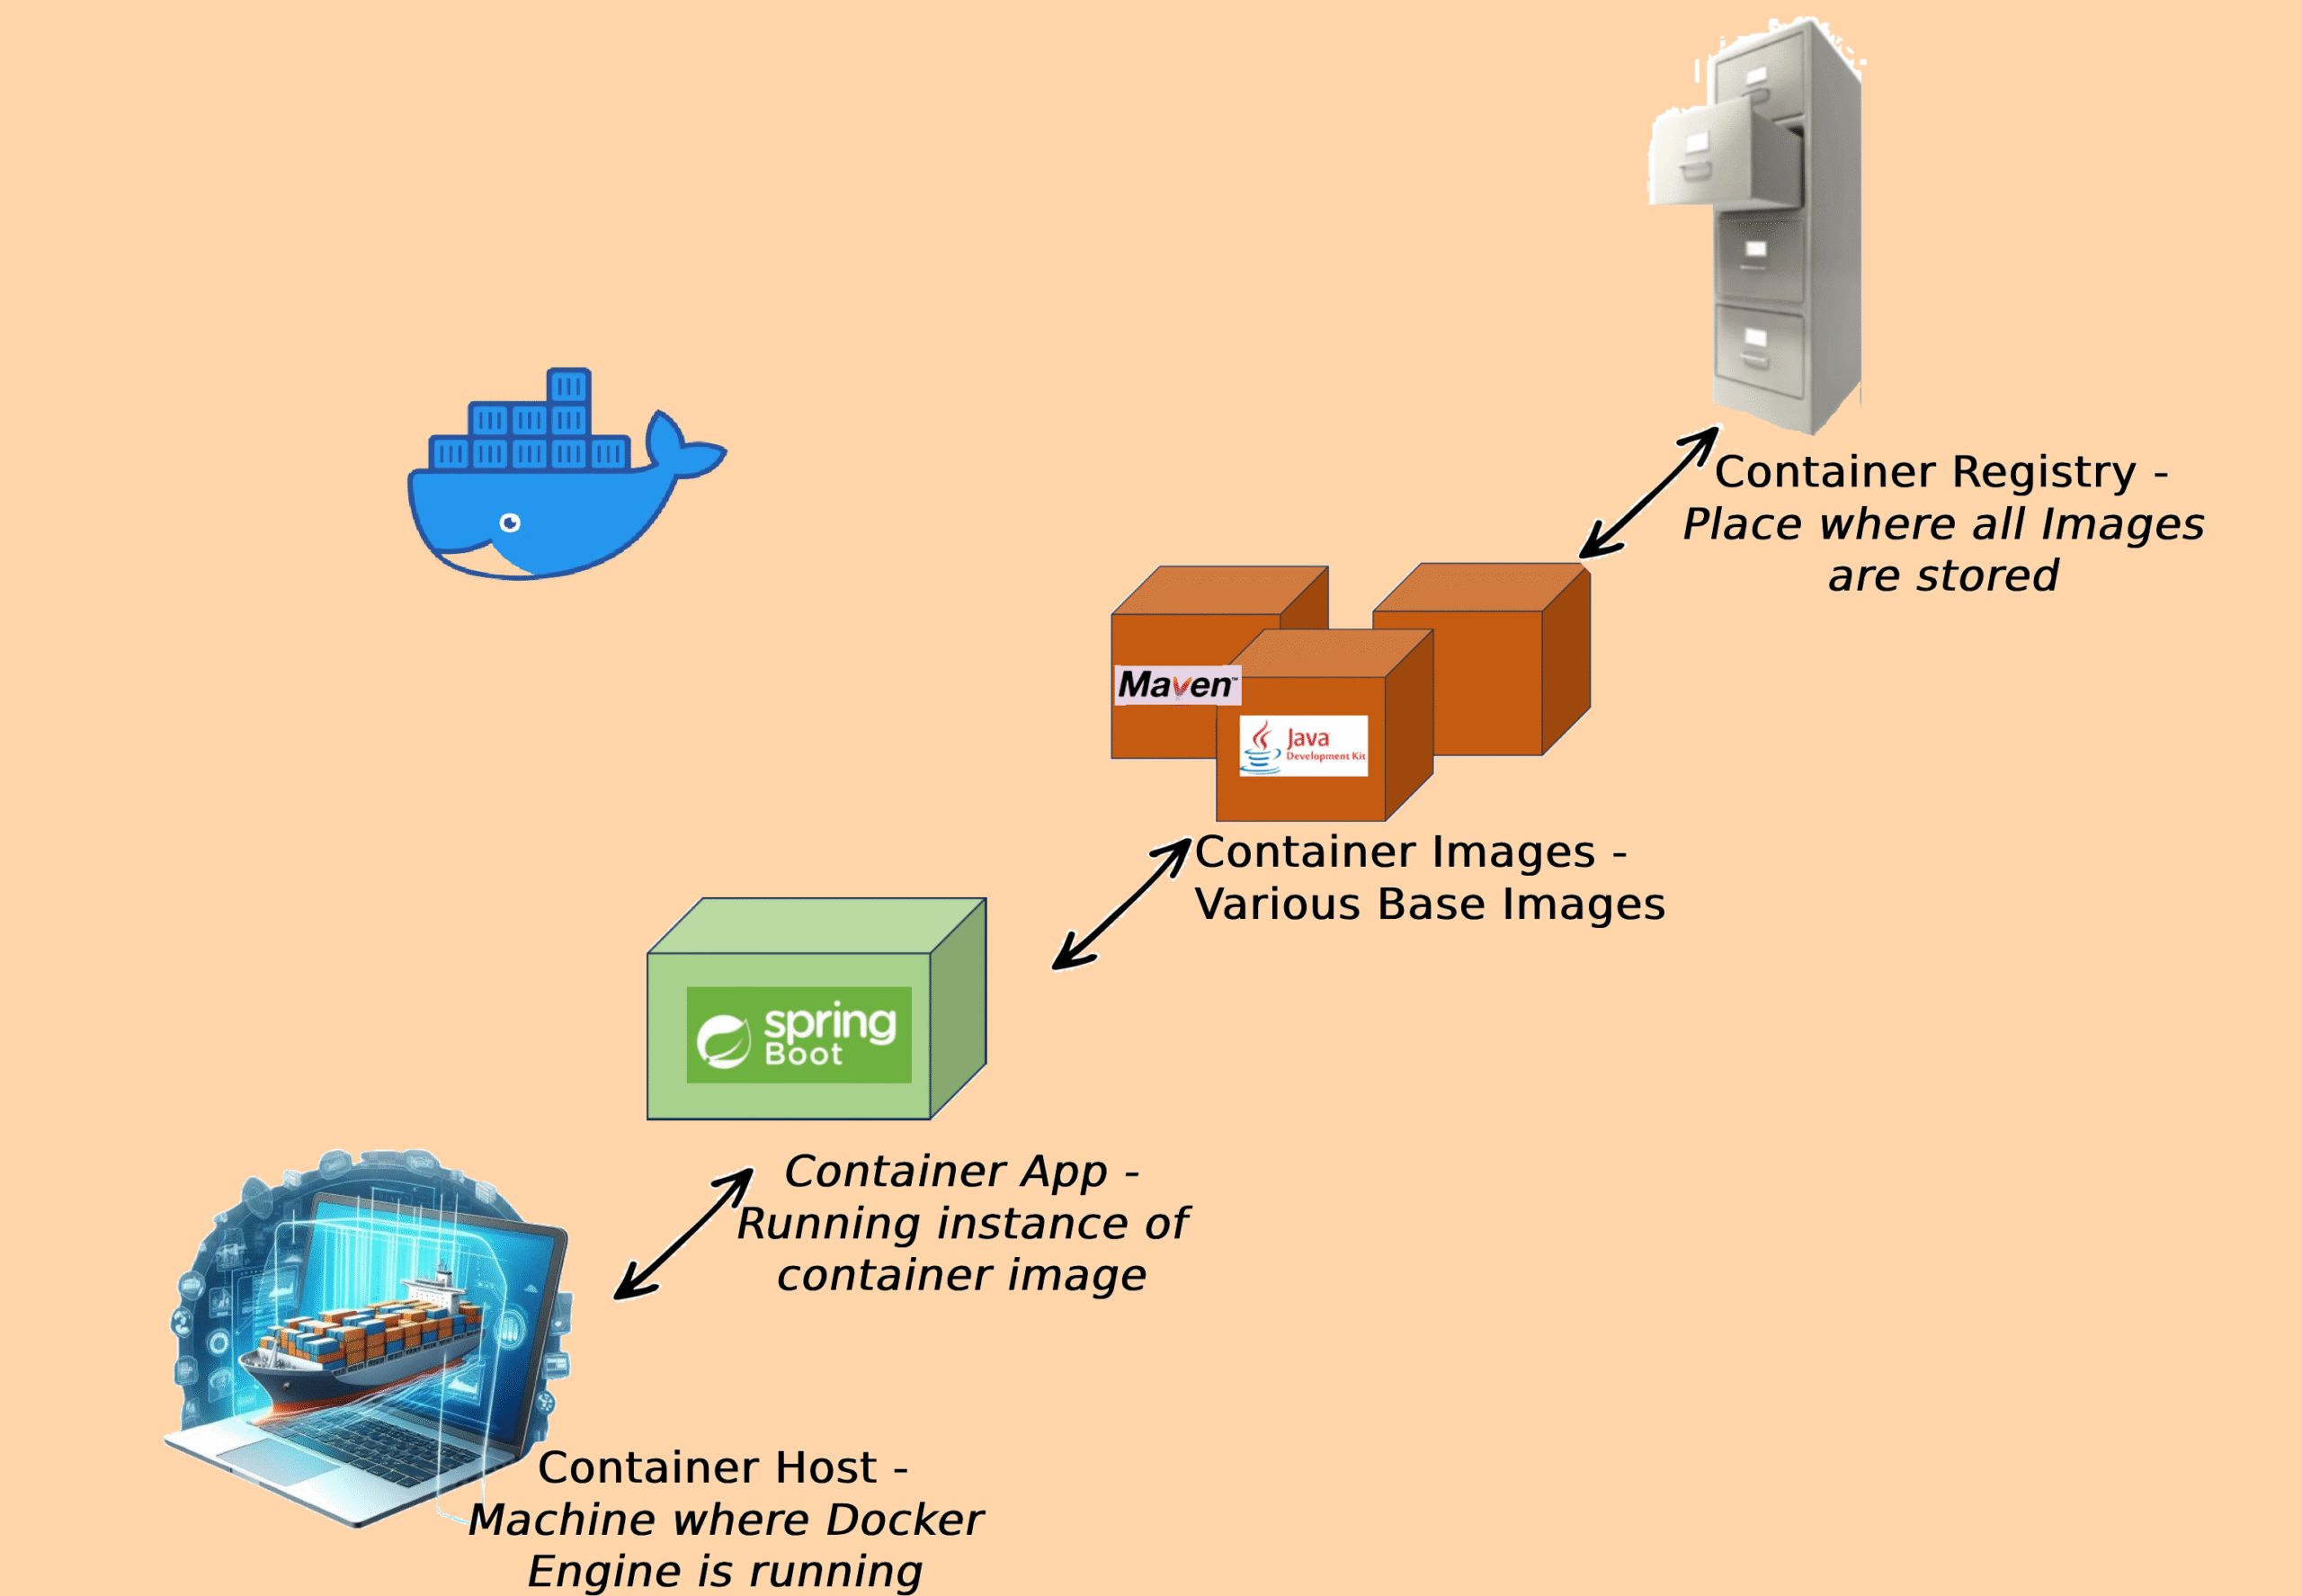
Docker is one of the most commonly used containerization technology and in below examples we will also use Docker.
- Dockerfile: A Dockerfile is a text document that contains all the commands you would normally execute manually in order to build a Docker image. Docker can build images automatically by reading the instructions from a Dockerfile.
- Compose- Compose is a tool for defining and running complex applications with Docker. With Compose, you define a multi-container application in a single file, then spin your application up in a single command which does everything that needs to be done to get it running.
Getting Started
Create a simple Spring Boot project using Spring Intializr, and add Spring Web, H2 Database, & Spring Data JPA dependency.
Let’s create a simple RESTful webservice that performs basic CRUD operations. Source Code
@RestController
@RequestMapping("/api")
public class EmployeeController {

    @Autowired
    private EmployeeRepo repo;

    @GetMapping("/get/{id}")
    public ResponseEntity<?> getEmployee(@PathVariable Integer id) {
        Optional<EmployeeEntity> empOpt = repo.findById(id);
        var result = empOpt.isPresent() ? empOpt.get() : "Employee with id:: " + id + " is not present in system";
        return new ResponseEntity<>(result, HttpStatus.OK);
    }

    @PostMapping("/add")
    public ResponseEntity<?> addNewEmployee(@RequestBody Employee emp) {
        EmployeeEntity empEntity = repo.save(mapToEntity(emp));
        return new ResponseEntity<>("Employee added with Emp id:: " + empEntity.getEmpId(), HttpStatus.CREATED);
    }

    @DeleteMapping("/delete/{id}")
    public ResponseEntity<?> deleteEmp(@PathVariable Integer id) {
        repo.deleteById(id);
        return new ResponseEntity<>("Employee records will be removed if exists", HttpStatus.OK);
    }

    private Employee mapToModel(EmployeeEntity empEntity) {
        return new Employee(empEntity.getEmpId(), empEntity.getEmpName(), empEntity.getDept(), empEntity.getLocation());
    }

    private EmployeeEntity mapToEntity(Employee emp) {
        return new EmployeeEntity(emp.getEmpId(), emp.getEmpName(), emp.getDept(), emp.getLocation());
    }

}
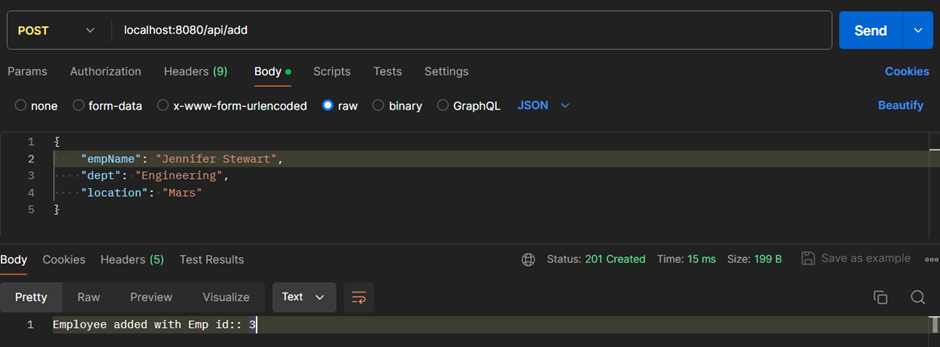
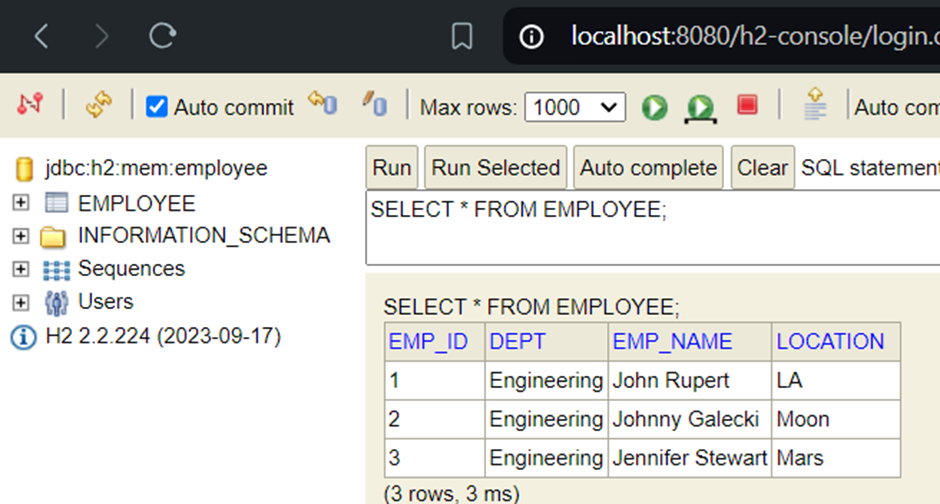
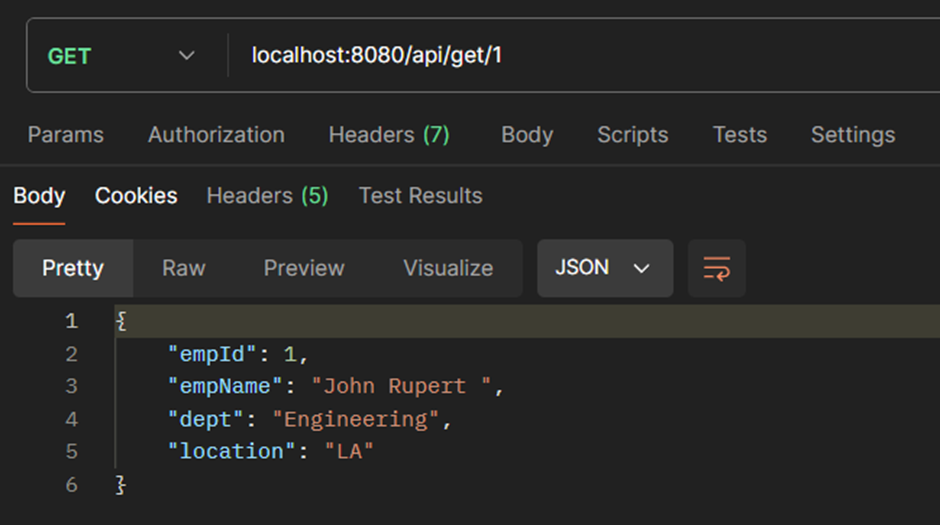
We can quickly test the application using curl operation or sending request via Postman and validate the data in DB.
Add New Employee
H2 DB Snapshot
Get Employee Details
Containerizing Spring Boot
Docker images for Spring Boot application can be easily created by using commands in Dockerfile.
# Do not use this Dockerfile in production
# This should only be used in Dev Env
FROM eclipse-temurin:17.0.11_9-jdk-ubi9-minimal
WORKDIR /app
COPY . /app
RUN ./mvnw clean package -DskipTests
EXPOSE 8080
ENTRYPOINT ["./mvnw", "spring-boot:run"]FROM– TheFROMinstruction initializes a new build stage and sets the base image for subsequent instructions. The lineFROM eclipse-temurin:17.0.11_9-jdk-ubi9-minimalmeans that your Docker image will be based on theeclipse-temurinimage, specifically the version17.0.11_9-jdk-ubi9-minimal.WORKDIR– TheWORKDIRinstruction sets the working directory for anyRUN,CMD,ENTRYPOINT,COPYandADDinstructions. The lineWORKDIR /appsets the working directory to/appand all the following commands will use/appas base directory to execute the commands.COPY– TheCOPYinstruction in aDockerfileis used to copy new files or directories from the source location (in this case, the current directory denoted by.) into the filesystem of the container at the specified destination (in this case,/app).RUN– TheRUNinstruction will execute any commands to create a new layer on top of the current image. The lineRUN ./mvnw clean package -DskipTestswill run the maven command and package the code in JAR file.EXPOSE– TheEXPOSEinstruction informs Docker that the container listens on the specified network ports at runtime.ENTRYPOINT– AnENTRYPOINTinstruction specifies the command that will be executed when the container starts. The lineENTRYPOINT ["./mvnw", "spring-boot:run"]sets the Maven Wrapper command to run a Spring Boot application as the default container command.
Building your Docker Image
To build your container image for the application, run the below command.
docker build . -t emp_manager:v1
Build images can be listed using the below command
docker images

Run your Spring Boot Docker Container
Now, its time to run the docker container and start our application. The docker run command is used to start a container from the specified image.
docker run -p 8080:8080 --name emp_manager emp_manager:v1

Once the application has started, it can be tested via Postman as shown previously.
Building Multi-Container Spring Boot Apps with Docker Compose
In production environments, it’s standard practice to opt for dedicated database servers, such as MySQL, Postgress or Oracle, over in-memory databases to ensure data persistence and scalability.
Let’s convert our spring boot application used in previous example to utilize MySQL database. And will use Docker Compose to start container for both Spring Boot application and MySQL database. Source Code
Add/update MySQL config properties in application.yml.
spring:
  application:
    name: containerizing
  jpa:
    hibernate:
      generate-ddl: true
    properties:
      hibernate:
        format_sql: true
    show-sql: true
  datasource:
    url: jdbc:mysql://mysql_db:3306/employee
    username: root
    password: root
    jpa:
      database-platform: org.hibernate.dialect.MySQLDialect
Next create a database initialization script, to create the employee database and required tables when the database server is up.
CREATE DATABASE  IF NOT EXISTS `employee`;
USE `employee`;

--
-- Table structure for table `employee`
--

DROP TABLE IF EXISTS `employee`;

CREATE TABLE `employee` (
  `emp_id` int NOT NULL,
  `dept` varchar(255) DEFAULT NULL,
  `emp_name` varchar(255) DEFAULT NULL,
  `location` varchar(255) DEFAULT NULL,
  PRIMARY KEY (`emp_id`)
) ENGINE=InnoDB DEFAULT CHARSET=utf8mb4 COLLATE=utf8mb4_0900_ai_ci;

--
-- Table structure for table `entry_seq`
--

DROP TABLE IF EXISTS `entry_seq`;

CREATE TABLE `entry_seq` (
  `next_val` bigint DEFAULT NULL
) ENGINE=InnoDB DEFAULT CHARSET=utf8mb4 COLLATE=utf8mb4_0900_ai_ci;
Now, lets create the docker compose file to start the multi-container application.
name: emp_manager_server
services:
  emp_manager:
    container_name: emp_manager
    restart: on-failure
    build:
      context: .
      dockerfile: Dockerfile
    image: emp_manager
    depends_on:
      - mysql_db
    ports:
      - 8080:8080
    networks:
      - emp_manager_ntw

  mysql_db:
    container_name: mysql_db
    image: mysql:8.0
    restart: on-failure
    command: --init-file /data/application/init.sql
    volumes:
      - ./init.sql:/data/application/init.sql
    environment:
      MYSQL_ROOT_PASSWORD: root
    networks:
      - emp_manager_ntw

networks:
  emp_manager_ntw:
    driver: bridge
The compose file has two services emp_manager – our spring boot application and mysql_db – MySQL database for our application.
In our Docker Compose setup, we’ve created a dedicated network emp_manager_ntwrk that enables seamless interaction between our Spring Boot application and the MySQL database. This configuration ensures that while both services can communicate internally, the database remains shielded from direct access by the external network.
Run your Spring Boot Multi-Container Application
docker compose up --build -d

The application has started, it can be tested via Postman as shown previously.
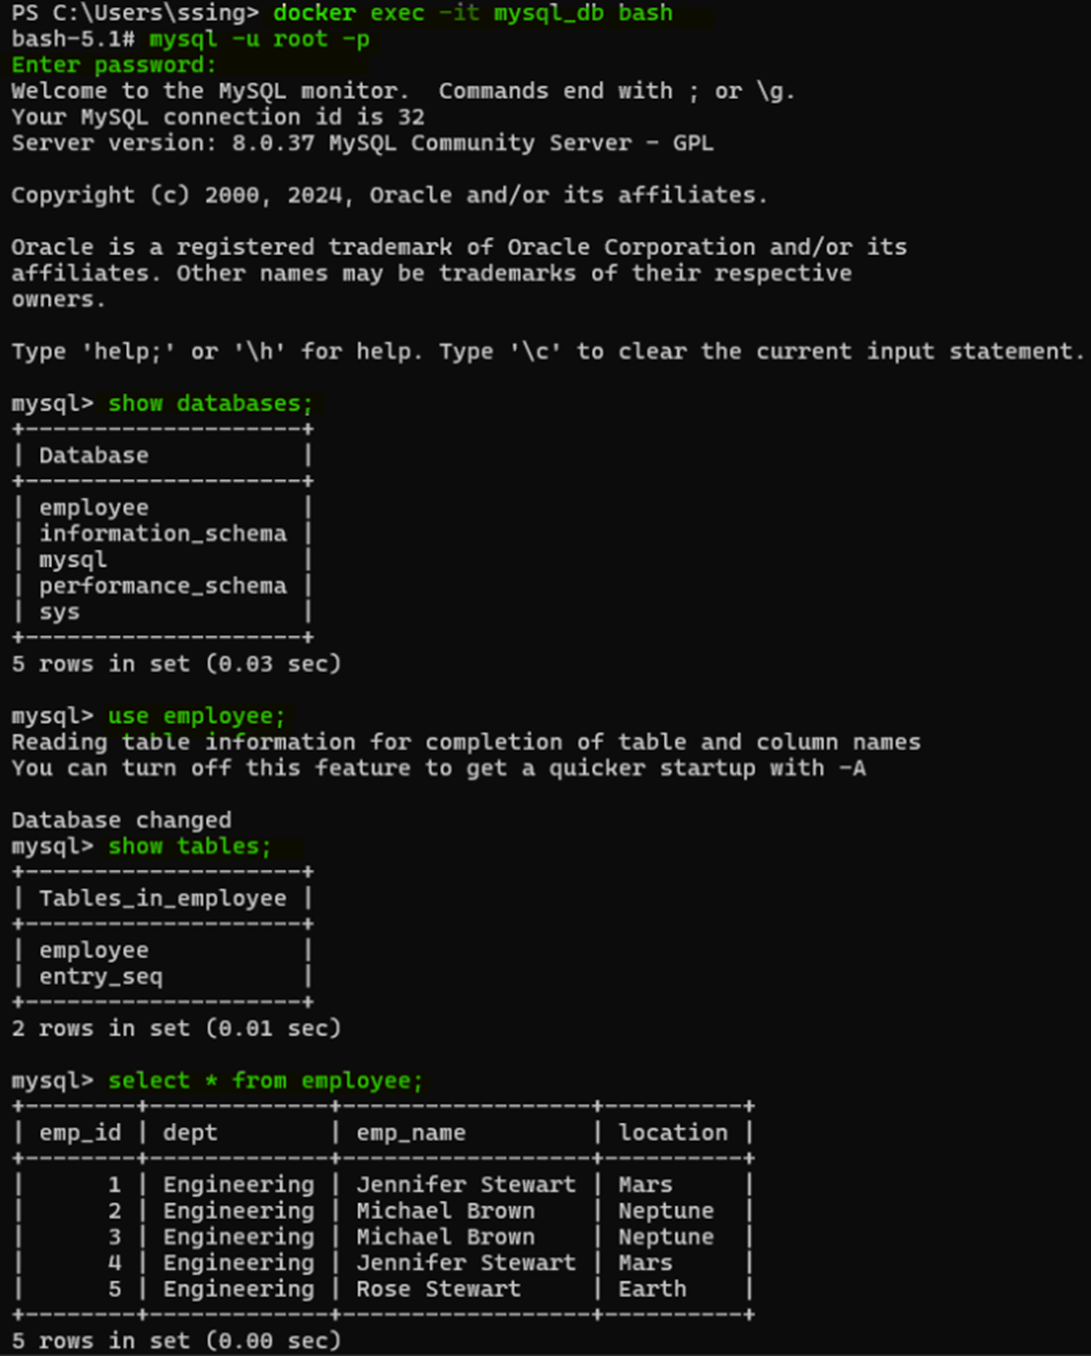
To validate the data in the database, you can simply go into the container and look at the database table with the docker exec command as shown below:
docker exec -it mysql_db bash
To stop the container and bring down your application you can use below commands:
docker compose down

Conclusion
In this article, we learnt how spring boot application can be containerized and deployed. We also saw how we can use Docker compose to construct a simple multi container application. The complete source code used in the example can be found @ GITHUB
